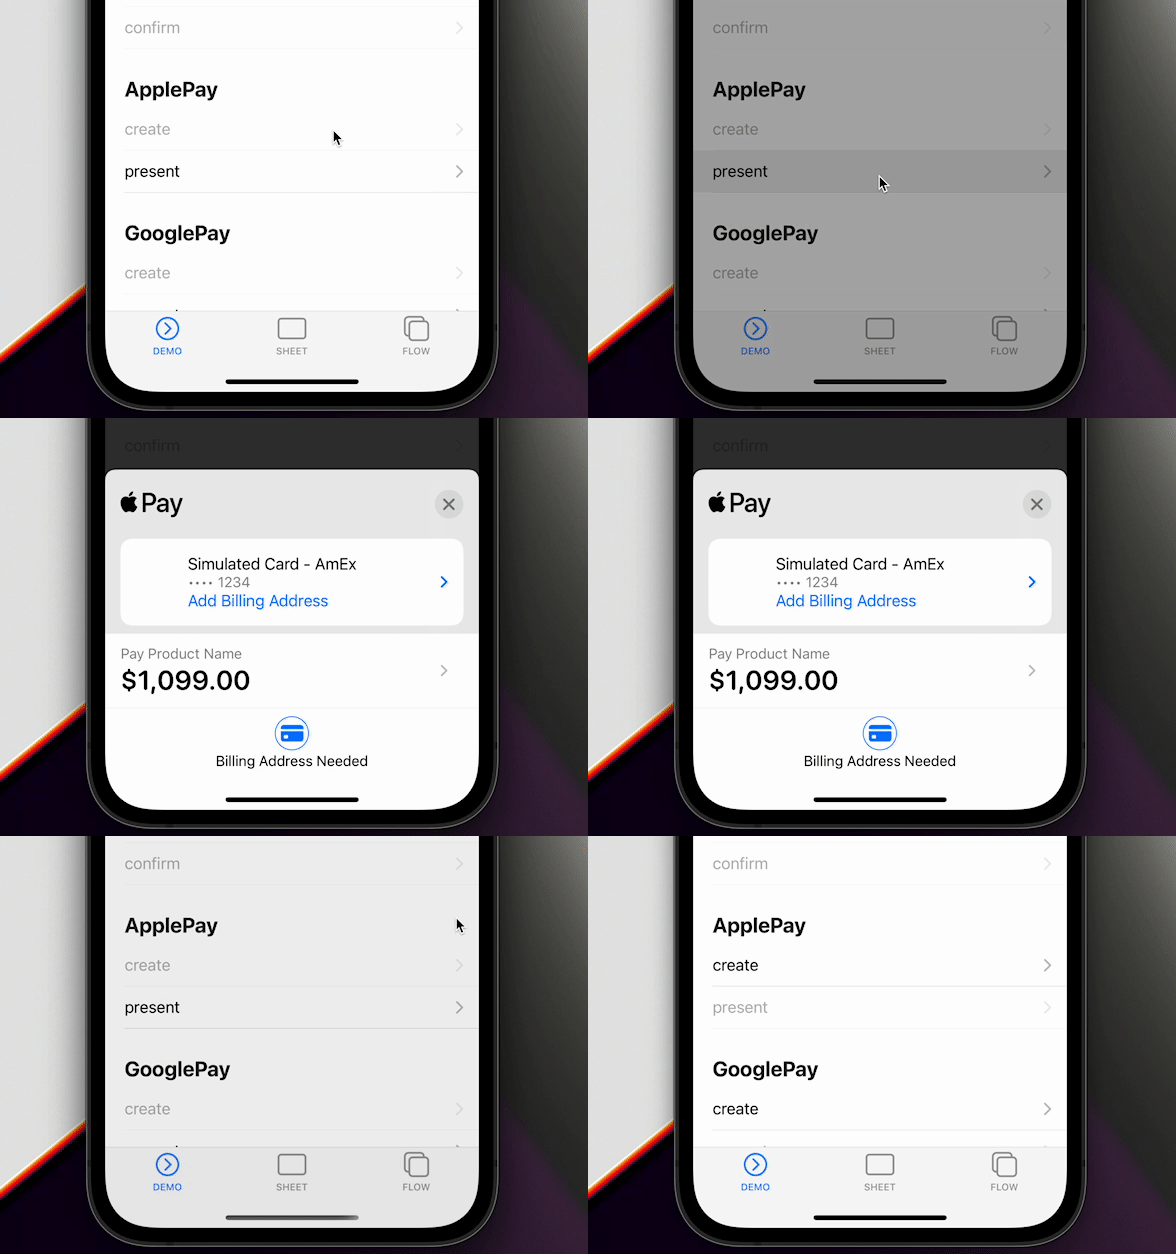
Apple Payを使えば、ワンフローで即時決済が可能です。詳しい設定は以下をご確認ください:
https://stripe.com/docs/apple-payhttps://stripe.com/docs/apple-pay

🐾 実装ガイド
Prepare settings
Apple Payを利用するためには、いくつかの設定が必要です。
- AppleマーチャントIDの登録
- Apple Payの証明書を新規に作成する
- Xcodeと統合する
詳細はこちらをご覧ください:
https://stripe.com/docs/apple-pay#merchantidhttps://stripe.com/docs/apple-pay#merchantid
もしこれらが正しく行われず、 createApplePay に与えられたオプションと異なる場合、このメソッドは実行することができません。
1. isApplePayAvailable
まず、ユーザのデバイスでApple Payが使えるかどうか確認します。
import { Stripe, ApplePayEventsEnum } from '@capacitor-community/stripe';
(async() => {
const isAvailable = Stripe.isApplePayAvailable().catch(() => undefined);
if (isAvailable === undefined) {
return;
}
})();
このメソッドは resolve(): void か reject('Not implemented on Device.') を返却します。
method isApplePayAvailable()
isApplePayAvailable() => Promise<void>
2. createApplePay
バックエンドエンドポイントに接続し、それぞれのキーを取得する必要があります。これは本プラグインでは「できない」機能です。そのため、
HTTPClient や Axios 、
Ajax などの機能を利用することができます。
Stripeは、バックエンドの実装方法を提供します:
https://stripe.com/docs/payments/accept-a-payment?platform=ios#add-server-endpointhttps://stripe.com/docs/payments/accept-a-payment?platform=ios#add-server-endpoint
その後、これらのキーを createApplePay メソッドに設定します。
(async() => {
const { paymentIntent } = await this.http.post<{
paymentIntent: string;
}>(environment.api + 'payment-sheet', {}).pipe(first()).toPromise(Promise);
await Stripe.createApplePay({
paymentIntentClientSecret: paymentIntent,
paymentSummaryItems: [{
label: 'Product Name',
amount: 1099.00
}],
merchantDisplayName: 'rdlabo',
countryCode: 'US',
currency: 'USD',
});
})();
method createApplePay(...)
createApplePay(options: CreateApplePayOption) => Promise<void>
createApplePay では、 CreateApplePayOption のオプションを使用することができます。
merchantIdentifier は Apple Developer Website で登録した値と同じである必要があります。
interface CreateApplePayOption
| Prop | Type |
paymentIntentClientSecret | string |
paymentSummaryItems | { label: string; amount: number; }[] |
merchantIdentifier | string |
countryCode | string |
currency |
string |
requiredShippingContactFields |
('postalAddress' | 'phoneNumber' | 'emailAddress' | 'name')[] |
allowedCountries |
string[] |
allowedCountriesErrorDescription |
string |
3. presentApplePay
createApplePay はシングルフローです。
confirm メソッドを必要としません。
(async() => {
const result = await Stripe.presentApplePay();
if (result.paymentResult === ApplePayEventsEnum.Completed) {
}
})();
method presentApplePay()
presentApplePay() => Promise<{ paymentResult: ApplePayResultInterface; }>
presentApplePay の返り値から ApplePayResultInterface を取得することができます。
ApplePayResultInterface は
ApplePayEventsEnum から作成されています。したがって、インポートして結果を確認する必要があります。
type alias ApplePayResultInterface
ApplePayEventsEnum.Completed | ApplePayEventsEnum.Canceled | ApplePayEventsEnum.Failed | ApplePayEventsEnum.DidSelectShippingContact | ApplePayEventsEnum.DidCreatePaymentMethod
4. addListener
Apple Payのメソッドはリスナーを通知します。もし、支払い処理が完了したときのイベントを取得したい場合は、 Stripe オブジェクトに
ApplePayEventsEnum.Completed リスナーを追加する必要があります。
Stripe.addListener(ApplePayEventsEnum.Completed, () => {
console.log('ApplePayEventsEnum.Completed');
});
使用できるイベント名は
ApplePayEventsEnum にあります。
enum ApplePayEventsEnum
| Members | Value |
Loaded |
"applePayLoaded" |
FailedToLoad |
"applePayFailedToLoad" |
Completed |
"applePayCompleted" |
Canceled |
"applePayCanceled" |
Failed | "applePayFailed" |
DidSelectShippingContact | "applePayDidSelectShippingContact" |
DidCreatePaymentMethod | "applePayDidCreatePaymentMethod" |
📖 Reference
詳しくはStripeのドキュメントをご覧ください。このプラグインはラッパーなので、詳しい情報はStripeのドキュメンテーションが役立ちます。
Apple Pay(iOS)
このプラグインの STPApplePayContext は pod 'Stripe' を利用しています。
https://stripe.com/docs/apple-payhttps://stripe.com/docs/apple-pay
"Merchant name" on the apple pay payment sheet #115
This is good issue for setting "Merchant name".
https://github.com/capacitor-community/stripe/issues/115https://github.com/capacitor-community/stripe/issues/115
