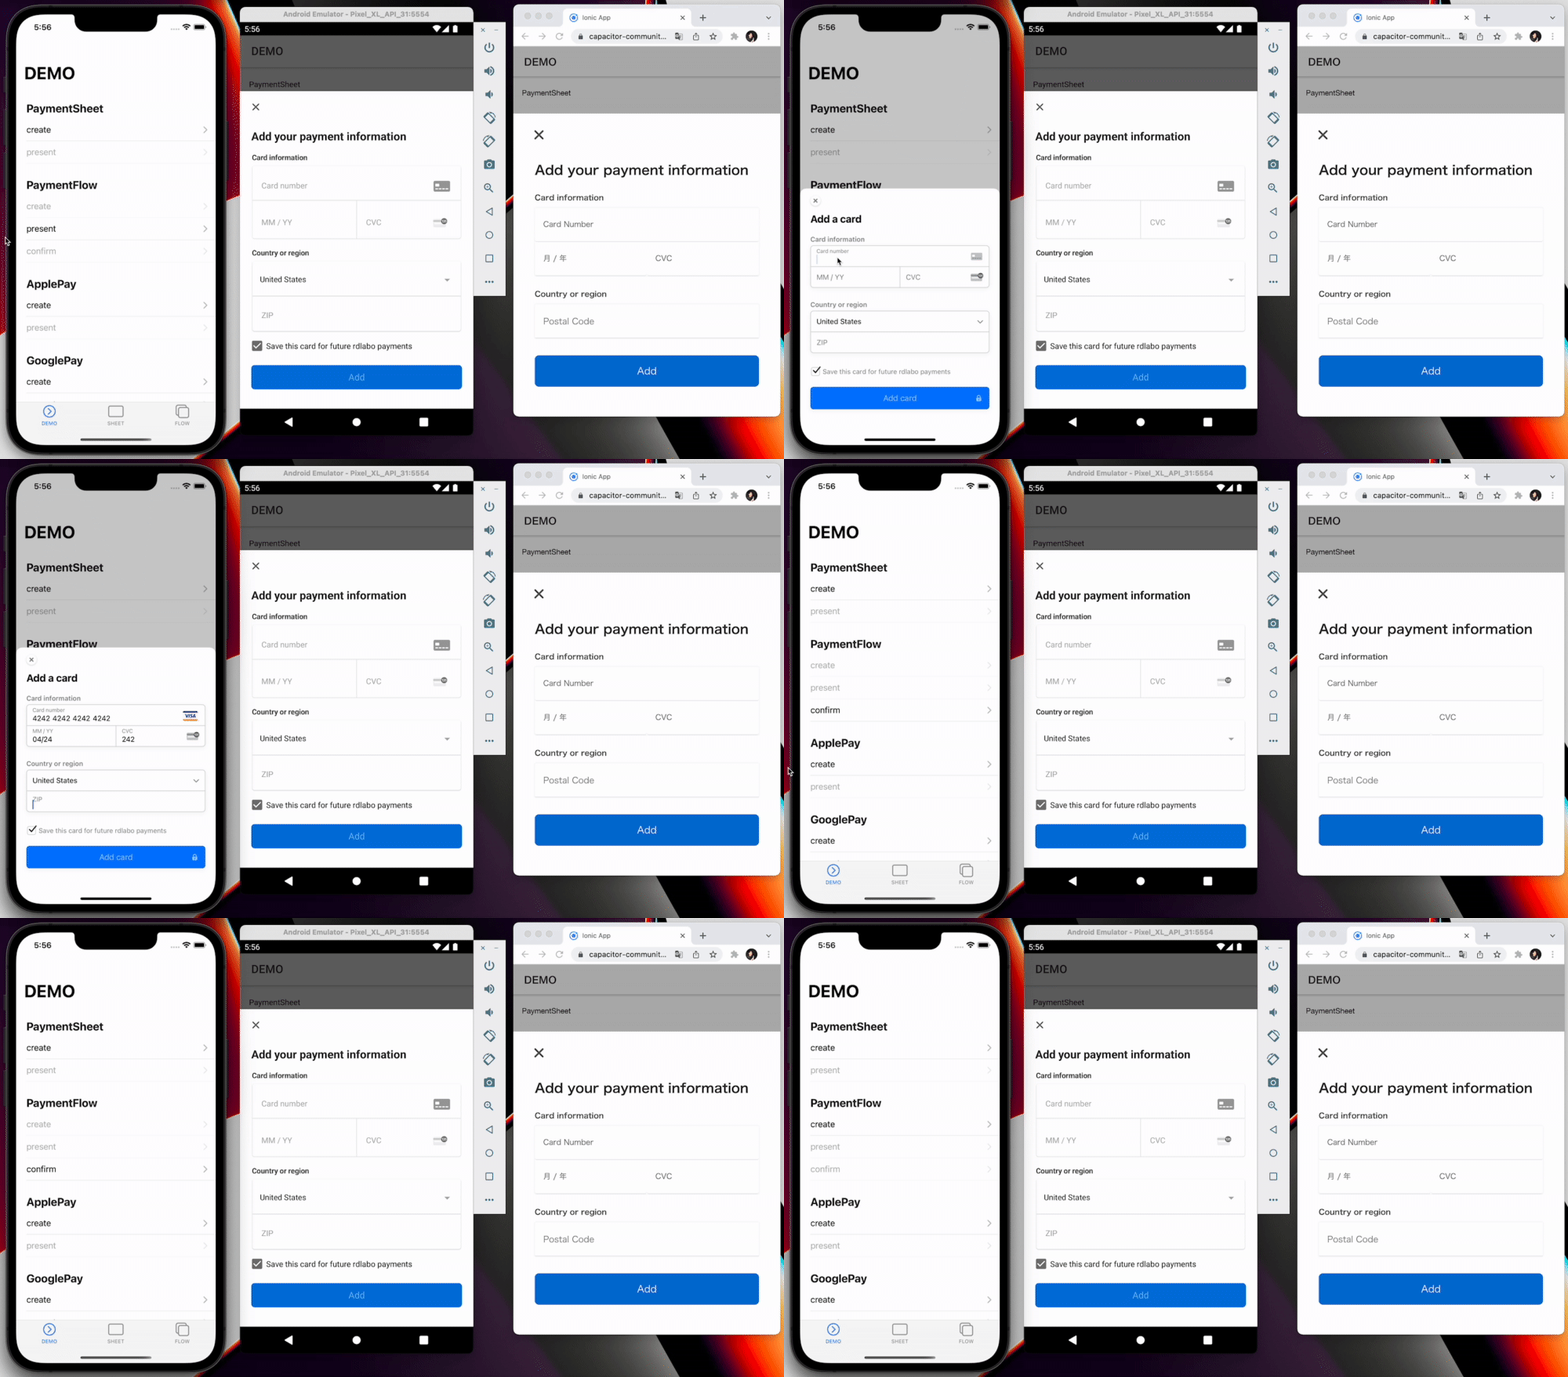
PaymentFlowを使えば、2ステップのフローで決済が可能です。ユーザーが
submit ボタンを押すと、システムはカード情報のみを取得し、保留状態にします。その後、プログラムが
confirm メソッドを実行すると、決済が実行されます。多くの場合、クレジットカード情報入力後に最終確認画面が表示されるフローで使用されます。

このメソッドは
PaymentIntent による即時決済と SetupIntent による将来の決済の両方に使用することができます。
これらのIntentが何なのかご存知ないですか?まずはStripeの公式サイトで学んでみてください。
PaymentIntent:
https://stripe.com/docs/payments/payment-intentshttps://stripe.com/docs/payments/payment-intents
SetupIntent:
https://stripe.com/docs/payments/save-and-reuse?platform=webhttps://stripe.com/docs/payments/save-and-reuse?platform=web
🐾 実装ガイド
1. createPaymentFlow
このメソッドはPaymentFlowのための設定です。使用する前に、バックエンドのエンドポイントに接続し、それぞれのキーを取得する必要があります。これは、このプラグインには「ない」機能です。そのため、
HTTPClient 、
Axios 、 Ajax などを使用することになります。以下は、AngularのHttpClientの例です。この例では、paymentIntent、ephemeralKey、ephemeralKeyを取得しています。
Stripeはバックエンドの実装方法を提供しています:
https://stripe.com/docs/payments/accept-a-payment?platform=ios#add-server-endpointhttps://stripe.com/docs/payments/accept-a-payment?platform=ios#add-server-endpoint
その後、これらのキーを createPaymentFlow メソッドで利用します。 paymentIntentClientSecret または
setupIntentClientSecret のいずれかを用意し、メソッドに設定する必要があります。
import { Stripe, PaymentFlowEventsEnum } from '@capacitor-community/stripe';
(async () => {
const {paymentIntent, ephemeralKey, customer} = await this.http.post<{
paymentIntent: string;
ephemeralKey: string;
customer: string;
}>(environment.api + 'payment-sheet', {}).pipe(first()).toPromise(Promise);
Stripe.createPaymentFlow({
paymentIntentClientSecret: paymentIntent,
customerEphemeralKeySecret: ephemeralKey,
customerId: customer,
});
})();
createPaymentFlow は CreatePaymentFlowOption のオプションを使用することができます。
method createPaymentFlow(...)
createPaymentFlow(options: CreatePaymentFlowOption) => Promise<void>
プロパティ paymentIntentClientSecret と setupIntentClientSecret のどちらかと、
customerId, customerEphemeralKeySecret は 必須 です。また、
デザインを設定して alwaysLight か alwaysDark にすることもできます。
ApplePay や GooglePay を PaymentFlowで設定することもできます。
interface CreatePaymentFlowOption
| Prop | Type |
Description | Default |
paymentIntentClientSecret |
string | Any documentation call 'paymentIntent' Set paymentIntentClientSecret or setupIntentClientSecret |
|
setupIntentClientSecret | string |
Any documentation call 'paymentIntent' Set paymentIntentClientSecret or setupIntentClientSecret |
|
billingDetailsCollectionConfiguration | BillingDetailsCollectionConfiguration |
Optional billingDetailsCollectionConfiguration | |
customerEphemeralKeySecret |
string | Any documentation call 'ephemeralKey' | |
customerId |
string | Any documentation call 'customer' | |
enableApplePay |
boolean | If you set payment method ApplePay, this set true | false |
applePayMerchantId | string | If set enableApplePay false, Plugin ignore here. |
|
enableGooglePay | boolean |
If you set payment method GooglePay, this set true | false |
GooglePayIsTesting |
boolean | | false, |
countryCode |
string | use ApplePay and GooglePay. If set enableApplePay and enableGooglePay false, Plugin ignore here. |
"US" |
merchantDisplayName | string |
| "App Name" |
returnURL |
string | | "" |
style |
'alwaysLight' | 'alwaysDark' | iOS Only | undefined |
withZipCode | boolean | Platform: Web only Show ZIP code field. |
true |
2. presentPaymentFlow
presentPaymentFlow メソッドを実行すると、プラグインはPaymentFlowを提示し、結果を取得します。このメソッドは createPaymentFlow の後に実行する必要があります。
(async () => {
const presentResult = await Stripe.presentPaymentFlow();
console.log(result);
})();
あなたはユーザが正常に承認した場合、
presentPaymentFlow の結果として { cardNumber: string; } を取得することができます。
method presentPaymentFlow()
presentPaymentFlow() => Promise<{ cardNumber: string; }>
PaymentSheetでは presentPaymentSheet メソッドでプロセスが終了します。 しかしPaymentFlowでは
presentPaymentFlow メソッドはまだ決済プロセスの途中です。
3. confirmPaymentFlow
(async () => {
const confirmResult = await Stripe.confirmPaymentFlow();
if (result.paymentResult === PaymentFlowEventsEnum.Completed) {
}
})();
confirmPaymentFlow の返り値から PaymentFlowResultInterface を取得することができます。
type alias PaymentFlowResultInterface
PaymentFlowEventsEnum.Completed | PaymentFlowEventsEnum.Canceled | PaymentFlowEventsEnum.Failed
4. addListener
PaymentFlowのメソッドはリスナーを通知します。もし、支払い処理が完了したときのイベントを取得したい場合は、 Stripe オブジェクトに
PaymentFlowEventsEnum.Completed リスナーを追加する必要があります。
Stripe.addListener(PaymentFlowEventsEnum.Completed, () => {
console.log('PaymentFlowEventsEnum.Completed');
});
使用できるイベント名は
PaymentFlowEventsEnum にあります。
enum PaymentFlowEventsEnum
| Members | Value |
Loaded |
"paymentFlowLoaded" |
FailedToLoad |
"paymentFlowFailedToLoad" |
Opened |
"paymentFlowOpened" |
Created | "paymentFlowCreated" |
Completed | "paymentFlowCompleted" |
Canceled | "paymentFlowCanceled" |
Failed | "paymentFlowFailed" |
📖 Reference
詳しくはStripeのドキュメントをご覧ください。このプラグインはラッパーなので、詳しい情報はStripeのドキュメンテーションが役立ちます。
独自のUIで支払いを完了する(iOS)
このプラグインの PaymentSheet は pod 'Stripe' を利用しています。
https://stripe.com/docs/payments/accept-a-payment?platform=ios&ui=payment-sheet#ios-flowcontrollerhttps://stripe.com/docs/payments/accept-a-payment?platform=ios&ui=payment-sheet#ios-flowcontroller
独自のUIで支払いを完了する(Android)
このプラグインの PaymentSheet はcom.stripe:stripe-android を利用しています。
https://stripe.com/docs/payments/accept-a-payment?platform=android&ui=payment-sheet#android-flowcontrollerhttps://stripe.com/docs/payments/accept-a-payment?platform=android&ui=payment-sheet#android-flowcontroller
